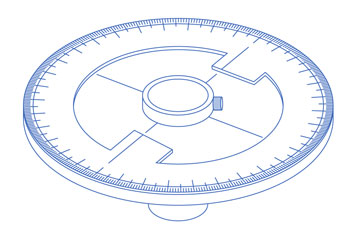
7) Insert the barlow through the hole in the protractor disc to check for fit. The fit should be snug and some twisting and wiggling may be needed to insert it the first time. If it is too snug, use your knife to evenly trim out a bit more material from the foam core hole.
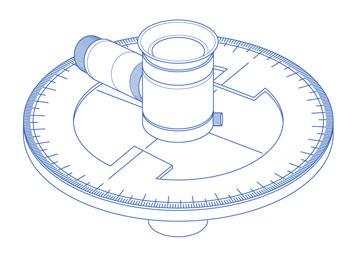
8) Insert the Astrometric eyepiece into the barlow and tighten the barlow locking screw.
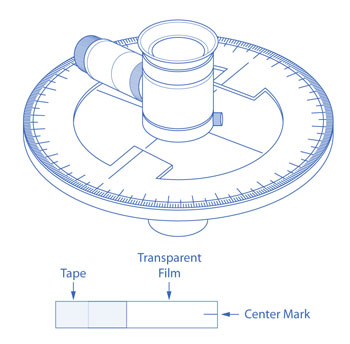
9) Trim a 1.5 – 2 cm wide strip of mylar or transparency film to a length that will allow it to span the distance from the lower edge of the astrometric eyepiece to the outer edge of the protractor.
10) Use a fine permanent marker to carefully center a thin pointer mark at one end of the transparent strip.
11) Cut a strip of tape to the same width as the transparency strip and apply it to the unmarked end of the strip with enough tape hanging freely to attach it to the eyepiece.
12) Look through the astrometric eyepiece (turn on the LED if necessary), and find the long, ruled scale that spans most of the diameter of the eyepiece (it should traverse the diameter between the 90 and 270 degree marks).
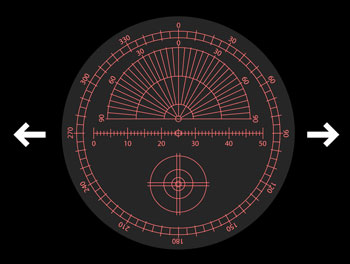
13) Note at which sides of the eyepiece this rule ends and attach your transparent pointer strip at one of these ends. It does not have to be precisely aligned with the long rule in the reticle, but it should be close. Be sure that the pointer extends radially from the eyepiece, and that it angles downward enough to rest against the protractor when released.
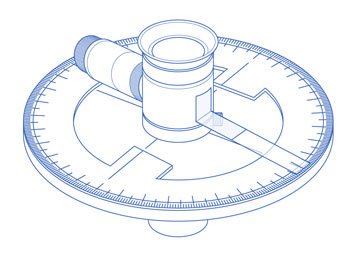
14) Add another piece of tape across the first piece to help secure the attachment.
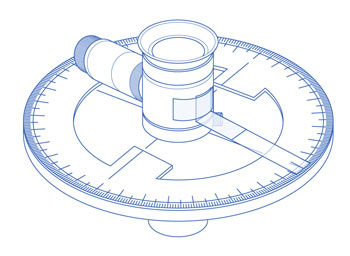
13) If you are not viewing with a mirror diagonal (such as when using a Newtonian) your protractor probably won’t follow astronomical PA standards for 360 degree angle sequence. To avoid confusion later, you may want to use your marker to write position angle numbers in thirty degree increments, counterclockwise around the inner circumference of the protractor.
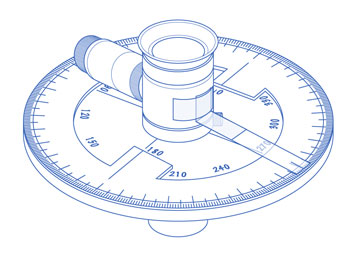
The astrometric eyepiece kit is now ready for calibration and use.
— PAGE 1 OF 3 || PAGE 3 OF 3 —
Hello Jeremy, You have a fantastic website and
enjoyed your Kitt Peak AOP story. We moved to Tucson three years ago from Syracuse NY. I worked
at Kitt Peak ( NOAO ) about a year and a half, doing NOP and AOP programs. It was a riot working with Kevin Bays and John Zumbrunnen. John and I always fought over using the 16″ R/C in the rolloff. ( Just busting each others chops )
This was before the addition of the 5″ APO, on the scope. With a minor back injury and moving towards Catalina, I had to give it up. Also to change the topic, I’m attempting to construct a double star eyepiece PA scale. I’ll be using it with a 6″SCT and a diagonal. I’m a little confused
. ( What a suprise!) When taking PA readings, I guess you have to take into account the reverse image. So the protractor has to be rotated 180 degrees?? Also, would this be the case when the scope is facing North and then moved to the South?. I’m probably making it more complicated than it is. Anyway, keep up the good work.
Thanks,
Vince T.
Hi Vince, working on the NOP/AOP programs sounds like a blast. I can imagine John and Kevin must have been great to work with.
You’re absolutely right about mirroring the PA scale for your SCT & diagonal. So the numbers will increase in a clockwise direction for your scope. That clockwise direction will remain the same regardless of what part of the sky you are observing. As long as you calibrate 270 degrees to the direction stars are exiting the field, the rest will fall in place. Let me know how that goes!
Jeremy