Step 5 – Filling out the Cluster:
With the core of NGC 869 complete, I began to spin my way outwards, looking for triangles, parallelograms, rhomboids and other proportional relationships to use in positioning the stars. (See Figure 5) As you begin to add more stars, it becomes easier and easier to find simple geometrical relationships to use for placement. But with objects that are thick with stellar life, it can be easy to get lost too. To help with that, I suggest working from bright to dim as you place your stars. This can help keep the area organized in your mind. I also try to work quicker at this point so that I have less chance of losing my place in the teaming bustle of stars.
Figure 5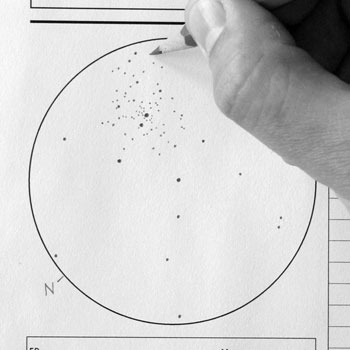
Click image for larger version.
Step 6 – Progressively Adding Field Stars:
After finishing the vicinity of NGC 869, I began to work clockwise around the view (See Figure 6) until reaching the bustle of NGC 884 in the lower right. At that point, I worked from the inside out again, much as I did with its companion cluster (See Figure 7). Having finished that, I worked my way from the 6 o’clock to the 10 o’clock position on the sketch to finish up all the star positions (See Figure 8).
Figure 6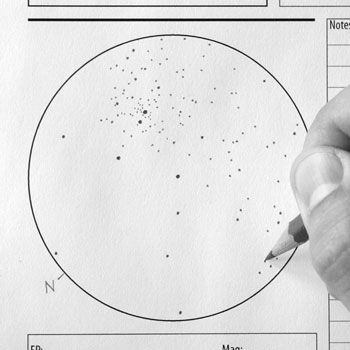
Click image for larger version.
Figure 7
Click image for larger version.
Figure 8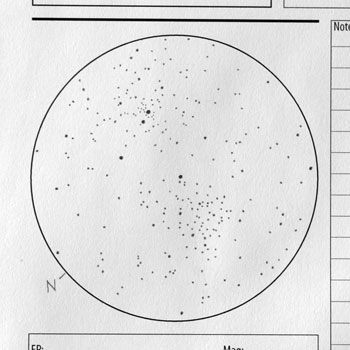
Click image for larger version.
At this stage, I took a relaxed, overall look at the view in my eyepiece and then assessed the weight of the stars in the sketch. I started with the brightest and bulked them up, and progressively moved down the line, slightly increasing the weight of medium-bright stars. If you make a faint star too bold, you might want to erase it and replot it very lightly with your pencil. Try to work on brightness levels in sets so that you keep the star weights in your sketch consistent and give a good representation of star luminosity (See Figure 9).
Figure 9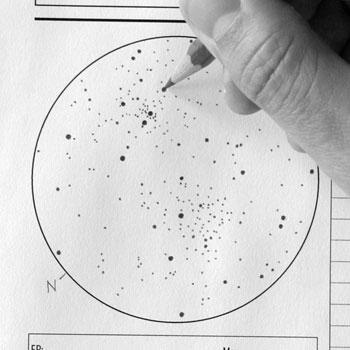
Click image for larger version.
Page 1 of 3 || Page 2 of 3 || Page 3 of 3