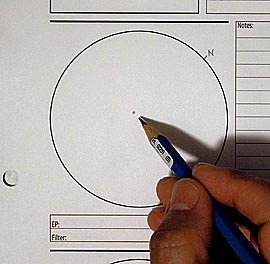
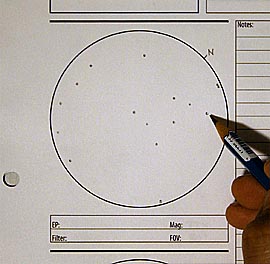
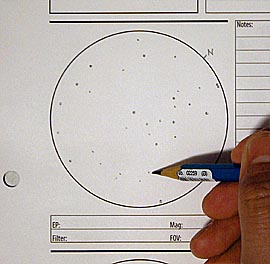
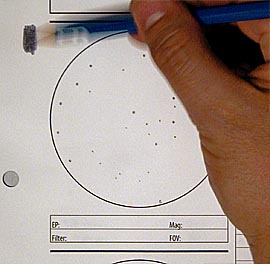
Even though I’ve been sketching my whole life, my recent experience with sketching at the eyepiece has introduced me to a new set of interesting challenges. The biggest issue issue is seeing your sketch area while not ruining your dark adaptation. I’ve got some info on sketch lighting here. Another issue is rendering objects faithfully in very dark conditions, particularly galaxies and nebulae. While I’m sure my approach will change with time, what follows is a step-by-step demonstration of how I approached my sketch of M81 and M82, Move your mouse over the images to see what the process looks like in the dark under a dim red light.

My first step is to choose a magnification that best suits the object I want to sketch. Sometimes I decide to do 2 sketches at different magnifications to capture different aspects. For example, low magnification might best show the splendor of the object, resting against a larger star field, perhaps with other notable objects sharing the view. A higher magnification might do a better job of bringing out subtle details within the object, or better discerning faint, close groupings of stars. Next I lightly rotate the declination slow-mo knob on the scope back and forth to help determine which direction is north and I mark that on the outside of the sketch circle. Once I’ve done that, I usually (but not always) try to find a moderately bright star that I can place at or near the center of the view. I mark that star first, and use it as a reference for sketching the remaining stars in the view. |

Next I start to mark the positions of the brighter stars in the view to lay the framework for the dimmer stars and extended objects that might be present. I use moderate, circular pressure when marking these, typically with a ‘B’ pencil, so they will stand out from the dimmer stars that get added later. The brighter a star is, the bigger a dot it gets. When looking through the eyepiece, I try to imagine a clock face and use that to determine the position of the main framework stars. I further try to estimate where the star is along an imaginary line from the center to the edge of the view. So for each of these stars, I’ll mouth something like “a bit above 3:00 and 3/4 of the way to the edge” as I look down to the sketch circle to mark it. The position of these first stars is very important. If the proportions are off by too much, it will really become frustrating as you start to fill in the remaining stars and extended objects later–this is particularly true with open clusters. Still, it just isn’t possible (at least not for me) to position all the stars perfectly. (See the mouse-over graphic at the end of my Barnard 33 observation for an example.) My goal is to get everything as close as I can, knowing it won’t be perfect, since in the end I’m not after an astro-photograph, I’m after a reasonable depiction of what I saw in the eyepiece with my own limited human nervous system. |

Once the main framework of stars is in place, I start to mark the positions of the dimmer stars. Here, I don’t always use the clock-face imagery to place them. If the star lies a particular distance between two bright framework stars, I’ll use that to place it. I also look for simple geometric shapes that the stars make–mostly different shaped triangles, but sometimes rectangles, squares, trapezoids, SpongeBob, etc. I mark these stars more lightly to indicate their lower brightness, and typically just use a quick, soft press of the pencil. It’s not easy to do this cleanly in the dark, especially when you’re trying to keep the sketch to a reasonable time frame. When I come back inside, I’ll examine the sketch and try to erase any bad flicks of the pencil so most of the stars are as dot-like as possible. In tight star fields, this is really tough, so sometimes I’ll save that cleanup for after I’ve scanned the sketch, and use the more forgiving tools in Adobe Photoshop (any image software with basic editing tools should let you do this). |

If the view features any nebulae, galaxies, or obvious diffraction spikes around bright stars, I’ll prepare to render these softer apparitions next. I used to try and lightly scratch these in with a pencil and then soften them later. But these tended to look rough and too dark for my taste. I wanted a more delicate touch for these subtle beauties. Where possible, I now use only a blending stump to lightly indicate these objects. To prep the blending stump, I first scrub in a dark patch somewhere outside the sketch circle with the pencil. |
PAGE 1 OF 3
NEXT PAGE
Related


Thank you for the basic lessons. I hope you will enjoy my first attempts at sketching…
http://www.aa0ni.org/sketch.htm
Thanks again and Clear Dark Skies!
– Daniel R
Daniel,
I’m very excited that the astro-sketching info helped. Thanks for letting me know what you thought. I enjoyed your site, and the sketches you’ve posted are great! I really appreciate the approach you are taking with the low power views to work on star placements, but not to get bogged down just yet with the mind-boggling complexities of something like a high-power M13. I still haven’t put together a detailed sketch of that one–just a rough contour sketch. But hopefully pretty soon…
Keep on posting those sketches. I look forward to seeing more!
Jeremy