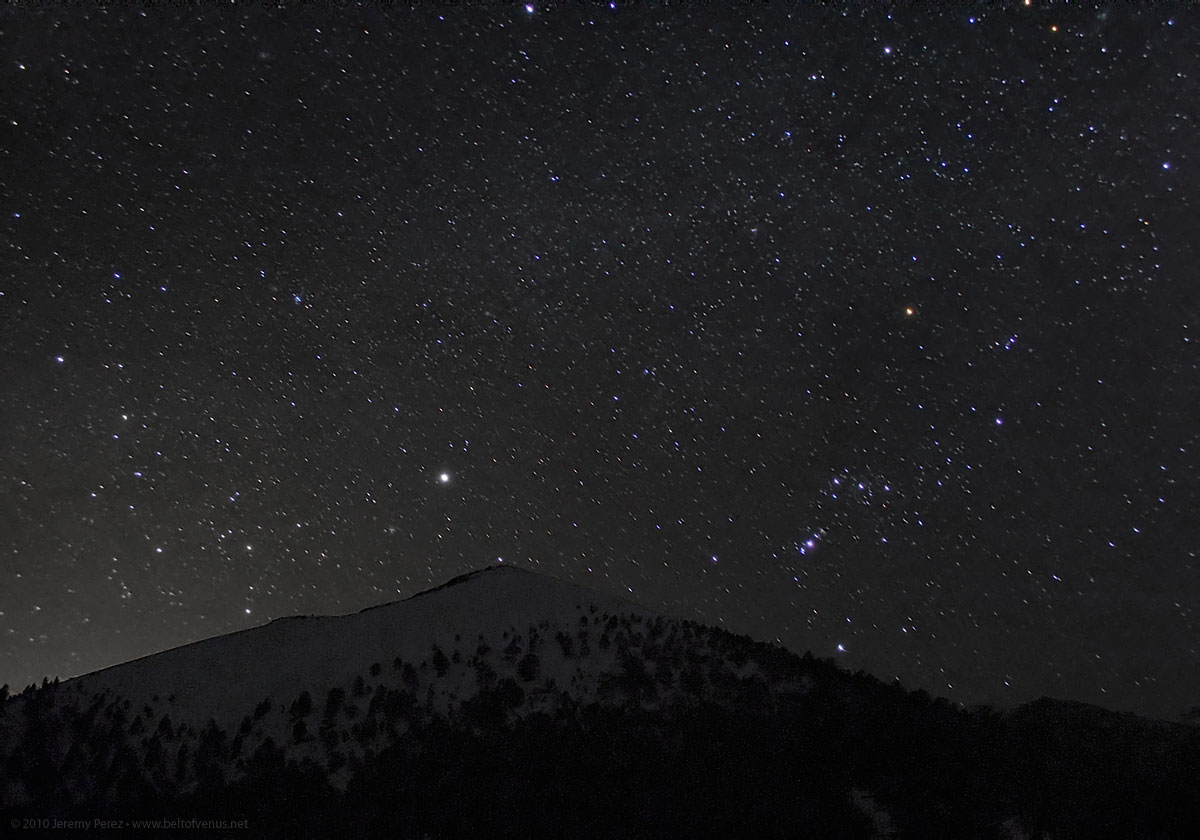
Orion, Canis Major, and the Winter Milky Way soar over Sunset Crater
Click for larger image
FEB 13, 2010 – 01:00 AM MST
Canon EOS 300D + Kit Lens @ 21 mm • ISO 800 • f/4.5
Composite: 11 x 30 sec. aligned, stacked, and composited separately for sky and foreground
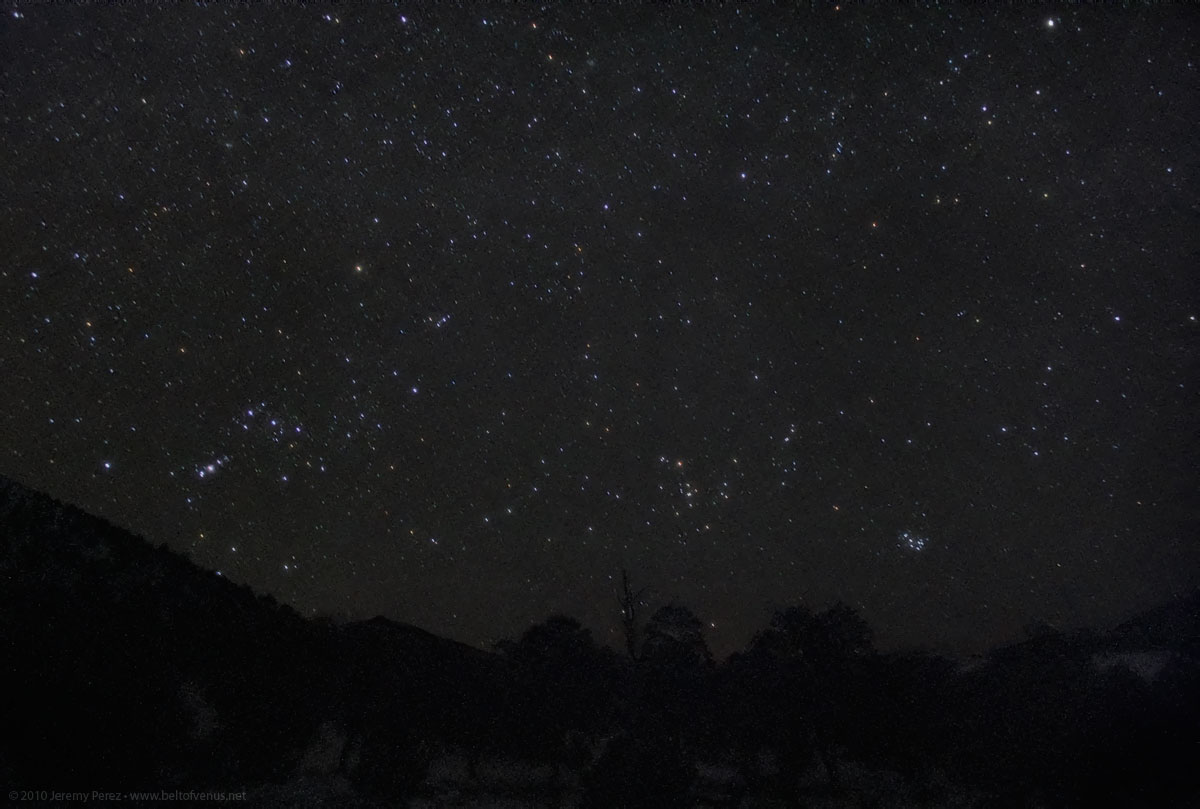
I said I was going to try this again. Things worked a little better this time (including remembering to check my ISO setting). I arrived early (12:30 AM 🙂 at Cinder Hills Overlook to work on an observation and sketch of Messier 101. Orion and Sirius would be in good position over Sunset Crater between 12:30 and 1:30 AM. After getting the series of shots I wanted, I couldn’t resist shooting another set to the northwest showing Orion, the Hyades, and the Pleiades all setting behind the hills and trees.
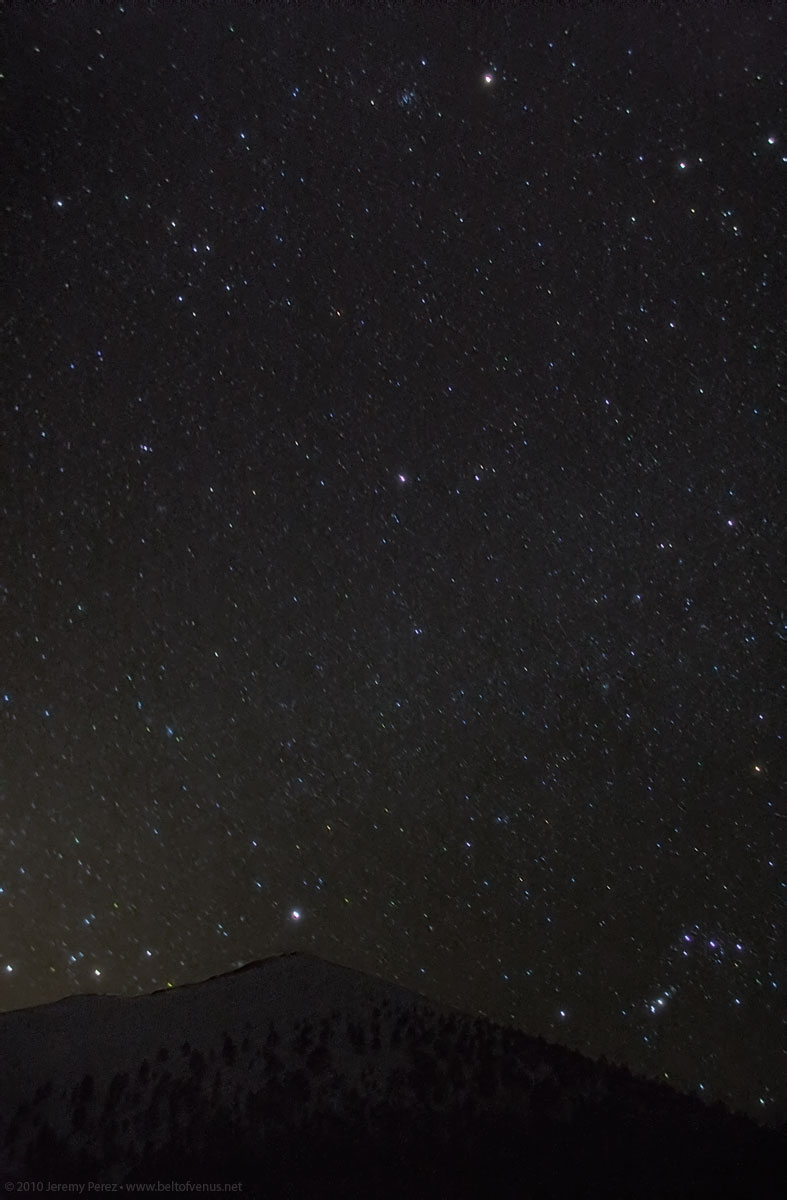
Mars, Procyon, and Sirius line up over Sunset Crater
Click for larger image
FEB 13, 2010 – 01:00 AM MST
Canon EOS 300D + Kit Lens @ 21 mm • ISO 800 • f/4.5
Composite: 6 x 30 sec. aligned, stacked, and composited separately for sky and foreground
I got three shots into that series before Rigel winked out behind the mountain. At that point, I noticed that Sirius, Procyon and Mars were making a brilliant alignment over the peak of the volcano. So I worked on a vertical series to capture them.
Mars, Procyon, and Sirius line up over Sunset Crater
Click for larger image
FEB 13, 2010 – 01:00 AM MST
Canon EOS 300D + Kit Lens @ 21 mm • ISO 800 • f/4.5
Composite: 6 x 30 sec. aligned, stacked, and composited separately for sky and foreground
Shooting 30 second tripod exposures makes random course-corrections pretty simple…perhaps too simple.
Processing one set of images is hard enough. Adding a second and third gave me a workout. It was a much needed workout too, since it forced me to refine my process. I made some improvements on the second image, and then again on the third image. By that time, I felt I had to go back and re-do the first and second again.
I’ve felt pretty confident handling stacking and compositing for sky and foreground. The processes I find challenging are:
- Removing green/red blotchiness from the dark sky background
- Removing just the right amount of noise without making the sky look plastic or crystalized
- Reducing the appearance of vertical and horizontal bands in these short exposures.
- Tamping down light pollution gradients with some level of finesse
Briefly, some of the solutions I arrived at:
- To color balance the background, I create a temporary layer, blur it extremely, and read RGB values in different parts of the sky that aren’t hit hard by light pollution or air glow on the horizon. I then apply a curves adjustment layer to balance the background to an average of neutral. Unfortunately, that doesn’t remove the color blotches. So I add a Hue/Saturation adjustment layer to substantially reduce saturation, and then use Astronomy Tools “Select Bright Stars” to create a mask for this layer that blocks out the stars, and leaves their color intact. Unfortunately, this removes the ability to feature any photographic color in the Milky Way, but for the type of color noise I have to deal with in these 30 second exposures, I think it’s a good sacrifice. I also like the way it better conveys the more neutral visual experience of the sky.
- I use Neat Image to tackle noise. Wide field images like this tend not to have decent sized empty areas that the software can sample for average noise. As a result I have to play with the settings over and over again to get what I like. I still don’t have a good system here. Just experimentation. I’ve saved my latest setting in hopes that I can use it again, but I have a feeling I’ll still have to fiddle with it quite a bit every time.
- The Astronomy Tools “Horizontal/Vertical Banding Noise Removal” action really does a great job removing much of the banding. However I’ve got some pretty huge bands in these frames, and it doesn’t remove those. Wherever these hit a soft hint of Milky Way, they become impossible to remove. A new camera may eventually help this situation 🙂
- A couple of the shots contained a pretty ripe light pollution tongue that tore right into the Milky Way. It doesn’t seem that obnoxious visually, so I did want to tame it a bit. I found that examining the individual color channels tended to give me some options. The green channel is the cleanest representation of the sky, but the blue channel hides the light pollution the best…the blue channel also seems to do a nice job of giving star groupings and the brightest blue stars a nice glow. I can do some channel blending operations to merge the best of these two channels to create a “Luminosity” layer. By setting this layer to Luminosity mode, I can trim the light pollution, bring out the Milky Way a little more, and in an added bonus, it blunts the horizontal/vertical banding a bit more if I’m careful how I blend blue and green (the blue usually has much worse banding than green). Adding a Hue/Saturation adjustment layer that subtly reduces the intensity of the yellow in shadow and midtones (to exclude stars) helps too.
I’ve still got a lot of improvement to do, but with the system I’ve scripted out, I have high hopes it will go smoother on my next attempts.
Nice pictures!!! Jeremy, can you recomend some tutorial or guide to processing separately sky and foreground?
I would like to take some pictures with landscapes and stars in my next observing.
Thanks a lot.
Akeru.
Thanks very much Akeru. I don’t recall any online tutorials that cover separate sky/foreground processing and compositing. I do have a little more discussion with this LONEOS image. That image was composited from 10 minute tracked/untracked exposures.
Basically, if you are taking tripod photos, try to shoot several exposures in the 10-30 second range to keep star trails short. Multiple exposures will allow you to reduce noise by stacking the images. Then:
1) Apply any dark and flat frame processing to the images.
2) Make two copies of the images: 1 for the sky and 1 for the foreground
3) Align and stack the foreground images (this will create longer star trails in the sky)
4) Align and stack the sky images–this is more difficult (it will create a blurry foreground)
5) Flatten or group each set of images and then place the foreground version on a top layer
6) Create a mask for the foreground that hides the trailed sky, allowing the sharp sky beneath it to show through.
7) Run noise reduction and adjust curves to affect both foreground and sky equally to suit your taste.
Those are the basics. If you have a camera with low noise under low light, you might get away with a single exposure. That would make the process a lot easier! No stacking or compositing needed. Getting rid of heavy noise and false color can be pretty tricky and I’m still experimenting with my workflow. If I can get a reliable system going, I’ll try to post a step-by-step at some point.
I know that’s not a lot, but I hope you get some nice shots the next time you go out!
Jeremy
OMG what amazing pictures! This is the 1st time in my life that I can recognize both the Pleiades and Hyades easily, in a dark-sky picture with lots of background faint stars! –My city sky is 4.5 limiting mag at its very best, I’ve never seen a dark sky in my life, I only started stargazing a year ago and I’m dying to see the Milky Way in all its glory some day in a real dark sky!!
That alignment Sirius-Procyon-Mars is very nice, specially because those days Mars was just past its opposition a couple of weeks and was almost as bright as Sirius, which is a rare event, because Mars’ oppositions occur only once every two years!
I’m a bit disappointed in the Winter Milky Way though, it is hardly recognizable, I wonder if it is that faint for real -live, naked-eye- or maybe the picture didn’t catch it fully or perhaps the sky wasn’t dark enough?
Thanks a million for sharing such beautiful pics!
Bibi K.
Hi Bibi, thanks for your comment! The Winter Milky Way is subtle compared to the Summer Milky Way–but definitely a beautiful and striking sight from a dark sky location. Be sure to get out to a dark site and spend some time with it, it’s definitely worth it.
The photos don’t do it justice. One thing is that you really need a much wider view than my photos to get a sense for how it appears amid the rest of the sky. Also, astrophotography is not my specialty, so this doesn’t show the Milky Way as well as it should be–when I try to increase contrast to show it better, I end up showing a distracting amount of imperfections and annoying noise in the image data.
I hope you get a chance to view it personally from a dark site soon.
Jeremy