When I was preparing the open cluster section of the Astronomical Sketching book, I put together a tutorial covering the Double Cluster in Perseus. In the end, I decided not to include it in the book in order to allow room for some other important content in that section. This still represents the most complex open cluster sketch I've created so far, and I think makes a good subject for a tutorial here.
Step 1 - Examining the Clusters:
I made the sketch in December of 2005 using my 15 cm, f/8 Newtonian, with a 32 mm Sirius Plôssl that provided a spacious 88 arcminute true field of view. The first thing that impressed me about these clusters as I scanned their immediate vicinity, was a streamer of stars that ran away to the north. Unfortunately, it wasn’t possible to include this feature in the eyepiece with both clusters. I had to save it for a later binocular sketch! The next thing I noticed was the contrasting density of the clusters, with NGC 884 appearing larger and less compressed than NGC 869 which was definitely brighter and more compressed. I also found a few orange stars glimmering warmly amid their otherwise white or blueish neighbors and gathering preferentially around NGC 884. Finally, I was drawn strongly to an almost heiroglyphic human figure at the center of NGC 869. The figure appeared bowlegged with a arched headdress on its head, holding a curved bow with a gleaming arrow that aimed northeast. After making note of these things and spending some time soaking in the view, I prepared for the sketch.
Step 2 - Framing the Sketch:
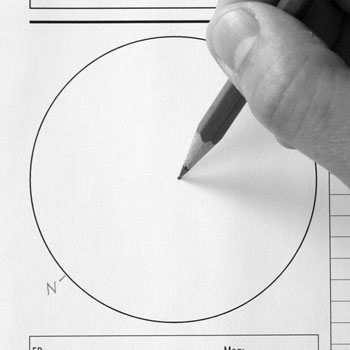
As with any sketch, the first thing I try to do is mark down at least one cardinal direction outside the sketch circle. Next I looked for a likely star to place at the center of the view. With the Double Cluster, there just happens to be a fortuitously place bright orange star midway between the two clusters, and this is the one I chose. After centering my view on this star, I plotted it with a 2H pencil (See Figure 1).
Figure 1
Click image for larger version.
Step 3 - Plotting Framework Stars:
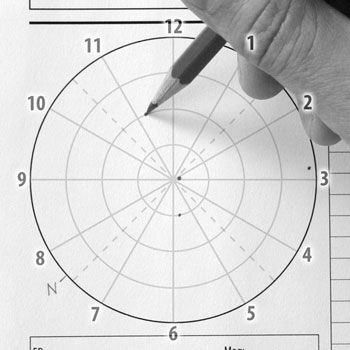
With those introductory matters out of the way, I moved on to plotting the surrounding framework of brightest stars. I try to imagine a clock face, 45° angles and concentric circles as I look at the bright stars in the eyepiece to see where they might fall in this imaginary template. For example, in the Double Cluster sketch (See Figure 2), one star was located conveniently just above the 3 o’clock position, almost at the edge of the field. Another was located in the 6 o’clock position, about one-quarter of the way from the center to the edge. A third star was a bit above the 11 o’clock position, and halfway to the edge.
Figure 2
Click image for larger version.
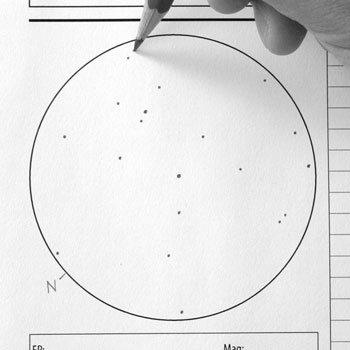
As you proceed through the placement of bright stars, you will start to run into those that don’t line up as easily with the template of clocks, 45s and concentric circles. At this point, start using geometric relationships to place new stars in relation to the ones you have already plotted. Keep an eye out especially for a variety of triangular shapes. Figure 3 shows the brighter framework stars in place.
Figure 3
Click image for larger version.
Step 4 - Plotting Core Stars in One Cluster:
With your framework of bright stars in place, begin to mark the remaining stars. Give some thought to turning your sketch light down further if you can manage it. You want to allow yourself to see the fullest extent of faint stars possible now. A star field as loaded as this is demands a systematic approach. I could begin working clockwise or counterclockwise from some point in the sketch, or I could choose the core of one of the clusters. I did a bit of both with this sketch. I decided to begin with the core region of NGC 869 since I found the asterism within so compelling. If you do choose to focus first on a concentrated grouping of stars, be sure you have enough bright framework stars in the area to give you some scale for the crowded arrangement of stars you will add. And remember to be methodical. It was very tempting to just dig right in and start sketching this little figure I saw at the core of NGC 869. But that would have been the road to a potentially gross exaggeration in the sketch. So I took time to compare proportions and relative positions of stars. For example, the arch of 4 stars that looked like a headdress pointed to about the 5 o’clock position. The outermost of those stars was not quite half the distance from the bright ‘head’ star as that bright star was from another nearby bright star in the 7 o’clock position. I used similar comparisons to complete the rest of the region as shown in Figure 4.
Figure 4
When you try to render a large number of stars in a very tight space, it can be easy to draw that area much larger than it actually is. So it is important to keep a very close eye on your proportions. You may need to exclude all but the brightest stars in the area if it becomes too crowded. In cramped quarters, you will also need to keep a close eye on the position of the tip of your pencil as it descends on the paper. The margin for error can be pretty unforgiving in these bustling regions.
Page 1 of 3 || Page 2 of 3 || Page 3 of 3


Hallo, very pretty article about work a design into opening cluster, I draw only nebulae and galaxy, as soon as will be fine weather like this try on draw open cluster according your articles
Miki, I hope the weather cooperates and you get a chance to try it out soon. I'd try to find a simple cluster to start with. M29 is nicely placed right now...
Thanks for your message!
Jeremy